UPDATED: April 16, 2025
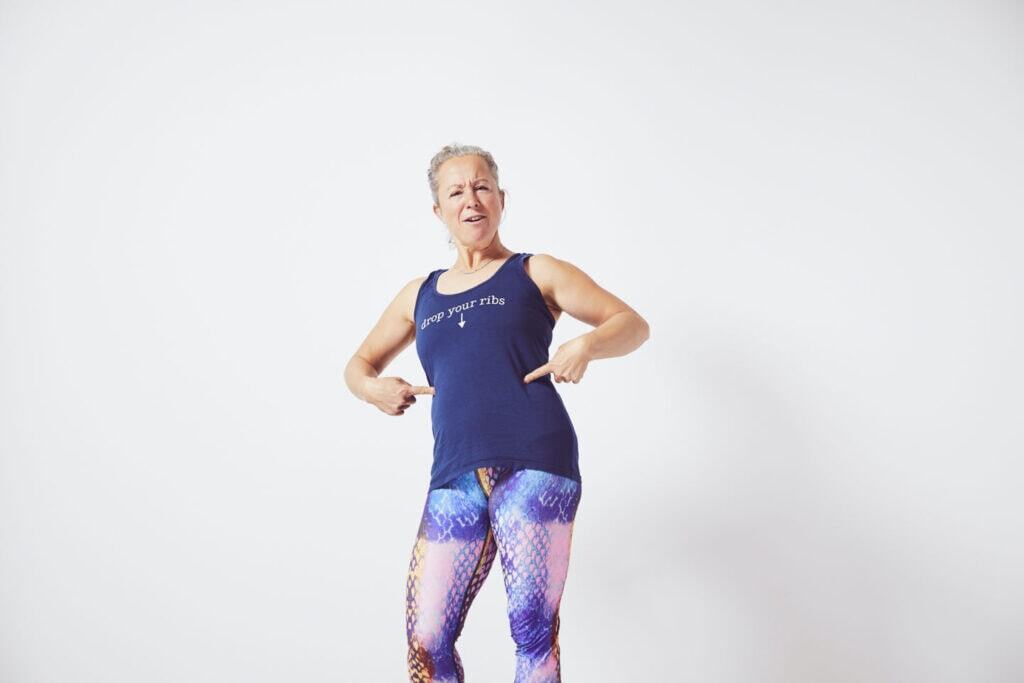
I made the mistake of wearing my Drop Your Ribs top at surf camp a few weeks ago and got a ton of questions from my surf camp neighbours.
Surfing is a sport that really messes with the spine and upper back, so almost all surfers could really use some help with their ribcage position, but it’s hard to explain why.
Ribcage position is complicated because it’s all about spinal alignment and mobility. That means that ribcage position is a huge deal, for our core, spine, and cardiovascular system – pretty key stuff.
The truth is, it’s not just surfers who need to work on dropping their ribs and spinal alignment. It’s almost all of us.
Today I’m going to tell you what ‘drop your ribs’ means, and why it’s important. And along with that, I’ll show you how to assess the current shape of your upper back. And why it’s important, and what to do about it. Get ready for a deeper dive into ribcage position and it’s BFF, spinal alignment!
Ribcage Position And Your Spine
Because our ribcage is attached to our spine, these parts are very closely related. In fact, it’s actually the shape of our spine that determines how our ribcage relates to the rest our body. That’s why you can’t really talk about one without the other.
Let’s Talk Spinal Anatomy
Here are some spinal anatomy basics so we can all be on the same page.
The first seven vertebrae in the neck are called the cervical spine.
Just below the neck, we have twelve thoracic vertebrae in the upper back – the ribs are attached to these guys, which is why they’re all so closely related. If the joints where the ribs attach are sticky, then the thoracic spinal joints will be sticky too.
Moving lower, we have five lumbar vertebrae in the lower back, which are really large and solid.
Finally there’s the large triangular bone of the sacrum which is where the spine and pelvis meet up, and then the little tailbone or coccyx curling under at the end.
The vertebrae are all numbered, so we have C1-C7 (C7 is the big bony one where our necks meet our backs if you want to find yours), T1-T12, L1-L5 and S1-S5, and the coccyx).
What’s A Spine Supposed To Do?
Ideally, a spine should be able to move at each joint along its entire length. Each joint should be able to flex forward, extend backwards and rotate to either side.
Each spinal joint has slightly different movement potential based on where it is in the back – for example, a lumbar joint in the lower back has less potential to rotate than a thoracic joint in the upper back.
Although each individual joint doesn’t have a lot of range, the spine as a whole has a great deal of movement potential, as you can see at any Cirque Du Soleil show.
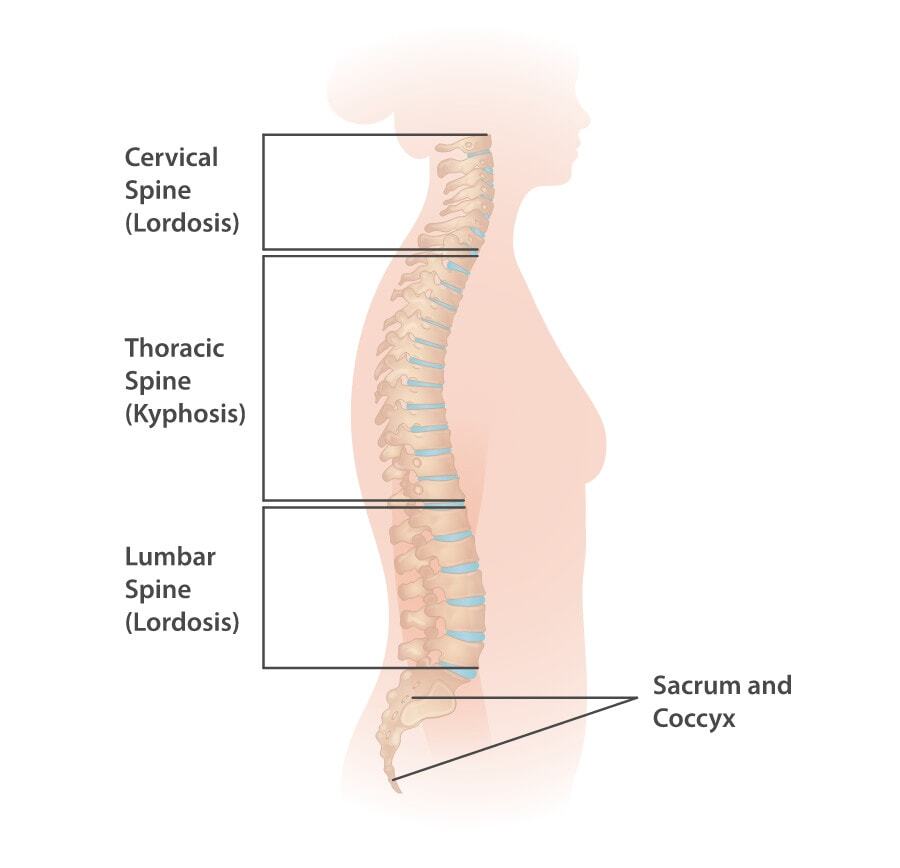
The spine is naturally curved so it can be nice and springy (for real – the curves in the spine create a literal spring that allows our bodies to absorb the forces created by walking, running and jumping).
It curves in at our lower back – which is called lumbar lordosis. Then it curves out at our upper back, known as thoracic kyphosis. And finally it curves in again at our neck, which is known as cervical lordosis.
How Modern Spines Actually Are
So that’s the ideal – but now let’s talk about the real-life modern spine.
Instead of a natural range of fluid movement at each joint, most of us have some really sticky spots that barely move and other spots that move more than they should.
And instead of a normal upper back curve, most of us have way more curve than we should – called hyperkyphosis.
This is the same extra curve we can see in some older people – but younger people are really great at hiding it. Unfortunately our hiding strategy is really damaging in the long term, so let’s drill down on this a bit.
Why Do We Have Hyperkyphosis?
I feel a bit like a broken record here, but we have all this extra upper back curve because of modern movement. Many different movement habits and patterns contribute to the excessive curve.
Poor walking
Chairs and shoes have made it hard for us to walk using hip extension and posterior push off (see this post for details).
As a result, most of us have to walk by falling forward into gravity. Each time we do these little mini falls, we give ourselves little mini whiplash. Over time, that adds up into a candy-cane shaped spine.
Static hunched positioning
Most of us also spend lots of time hunched over computers. Our bodies adapt to the hunch by becoming…hunched.
Not using our ribs as part of our breathing mechanism
And during all that time we spend hunching, we’re also not breathing very actively. We tend to use our belly or upper chest to breath, instead of expanding through our ribcages. This means that our ribs don’t get enough movement.
The ribs attach to the thoracic spine. So when the ribs don’t move well, our upper backs also get sticky and immobile.
And we don’t hang enough.
Modern humans don’t do much hanging and climbing.
As babies, humans are supposed to cling to their (foraging, walking, moving) mothers – which would start developing some pretty crazy upper body musculature from an early age.
If you were stuck in a stroller or even a baby carrier, you missed out on this.
And as adults most of us never hang or climb. So the pulling forces that would create a better upper back curve are missing from our lives (get more info on hanging here).
How We Hide Our Hyperkyphosis
Hyperkyphosis is super sneaky, because we are sooooooo good at hiding it. How do we hide it?
By lifting our lower ribs up – which is really a rotation of our entire ribcage.
This makes us look WAY better on the outside. Less like a hunchback, more like a human.
But unfortunately all this does is displace the ribcage and upper back. Now instead of having hyperkyphosis, we have hidden hyperkyphosis.
In the video below, pretty much all my movement as I lift and drop my ribs here is coming from that T12/L1 junction, not from movement of my upper back. However in the last part where I drop my ribs and then ramp my head back, the movement is true upper back movement – this is the end goal that we’re looking for. Ribs down, spinal curves the way they should be!
Why Rib Lifting Is A Problem
Sadly, ribcage lifting creates some serious problems for our bodies. The ribcage lifting I’m showing in the video above is really a rotation – the ribcage rotates up and forward at the bottom. This rotation happens almost entirely at a single vertebral joint (usually T12/L1) which leads to this joint becoming extremely mobile (otherwise known as hypermobile or hyperlax).
In fact the movement of rib thrust at this single joint is so big that instead of being ‘extension’, which is the normal movement of the joint rotating backwards, it’s actually a shear.
Shear stresses are defined as “two forces acting parallel to each other but in opposite directions so that one part of the object is moved or displaced relative to another part.”
Not surprisingly, shear forces are the most damaging physical force for our bodies. It is NOT cool when you think about one of our spinal joints being held in an almost constant state of shearing forward!
What Happens When We Shear Our Spines?
Though I’m sure there are many not-awesome consequences of this shearing, here are a few major ones:
1️⃣ The spine experiences lower-than-normal loads on the vertebral bones. Bones need loads to stay strong so this contributes to lower bone density in the spine – aka fractures and osteoporosis. In the SPINE.
2️⃣ The stuff around the spine also shears. That includes the abdominal aorta, the major artery sending blood to the lower body. When blood vessel geometry is complex – with bends or junctions – they tend to accumulate plaque. I’m personally a fan of keeping my aorta as straight as possible!
3️⃣ The forward movement of the lower ribcage creates a lot of forward pressure on the abdominal wall. Not only does this make it impossible for the core muscles to function well, but issues like diastasis recti and hernias are closely related to inappropriate abdominal pressure.
4️⃣ Other parts of the spine get sticky and immobile. It’s a basic rule of bodies – when one part moves too much, other parts get tight to make up for it (and vice versa). Sticky, immobile parts are weak, undernourished, and unhelpful. Typically our entire upper back is super sticky – in other words, that whole hyperkyphotic area becomes really hard to move because we move so much near T12.
5️⃣ Shearing messes up our psoas muscles, which mess with everything else. A rib shear puts these super important muscles into a constantly short position. In turn, that means we can’t walk well and are stuck with that ‘falling forward’ motion. Tight psoas muscles and a lack of hip extension can mash our knees, weaken our hips, hurt our low backs, and overload our necks. OMG, right?! Once the psoas muscles are tight, they actually create rib thrust all by themselves, so it’s a reflexive cycle.

And on top of all that, as someone who used to be a GIANT rib thruster, I can personally attest to how sore and uncomfortable it made my lower back. That constant rib thrust takes a toll on the back muscles!
So hyperkyphosis and the rib thrust that goes along with it is a major issue for our bodies, but like I said, there’s a lot we can do to fix it!
Assess Yourself: Do YOU Have Hyperkyphosis?
Here’s a simple test you can try to figure out the current state of your upper back.
I’ll warn you, many people find this a bit distressing.
It’s not fun to see this kind of curvature in our bodies.
But remember – this isn’t your fault – you can’t help the culture you were born in!
And the great news is that it’s something that we can change and improve. But you have to start by knowing what’s really there.
Here’s What To Do
Step One: Find a flat, clear wall
Step Two: Gently place your butt, shoulders and head on the wall – don’t lean, just use the wall like a ruler
Step Three: Make sure your hips are vertically aligned over your heels – this is important because you need to create a ‘zero’ to measure from. Here’s a post on how to find this vertical hip over heel alignment if you want more details.
Step Four: Now curl your upper back forward until your lower ribs are fully on the wall – make sure you don’t flatten your lower back at the same time.
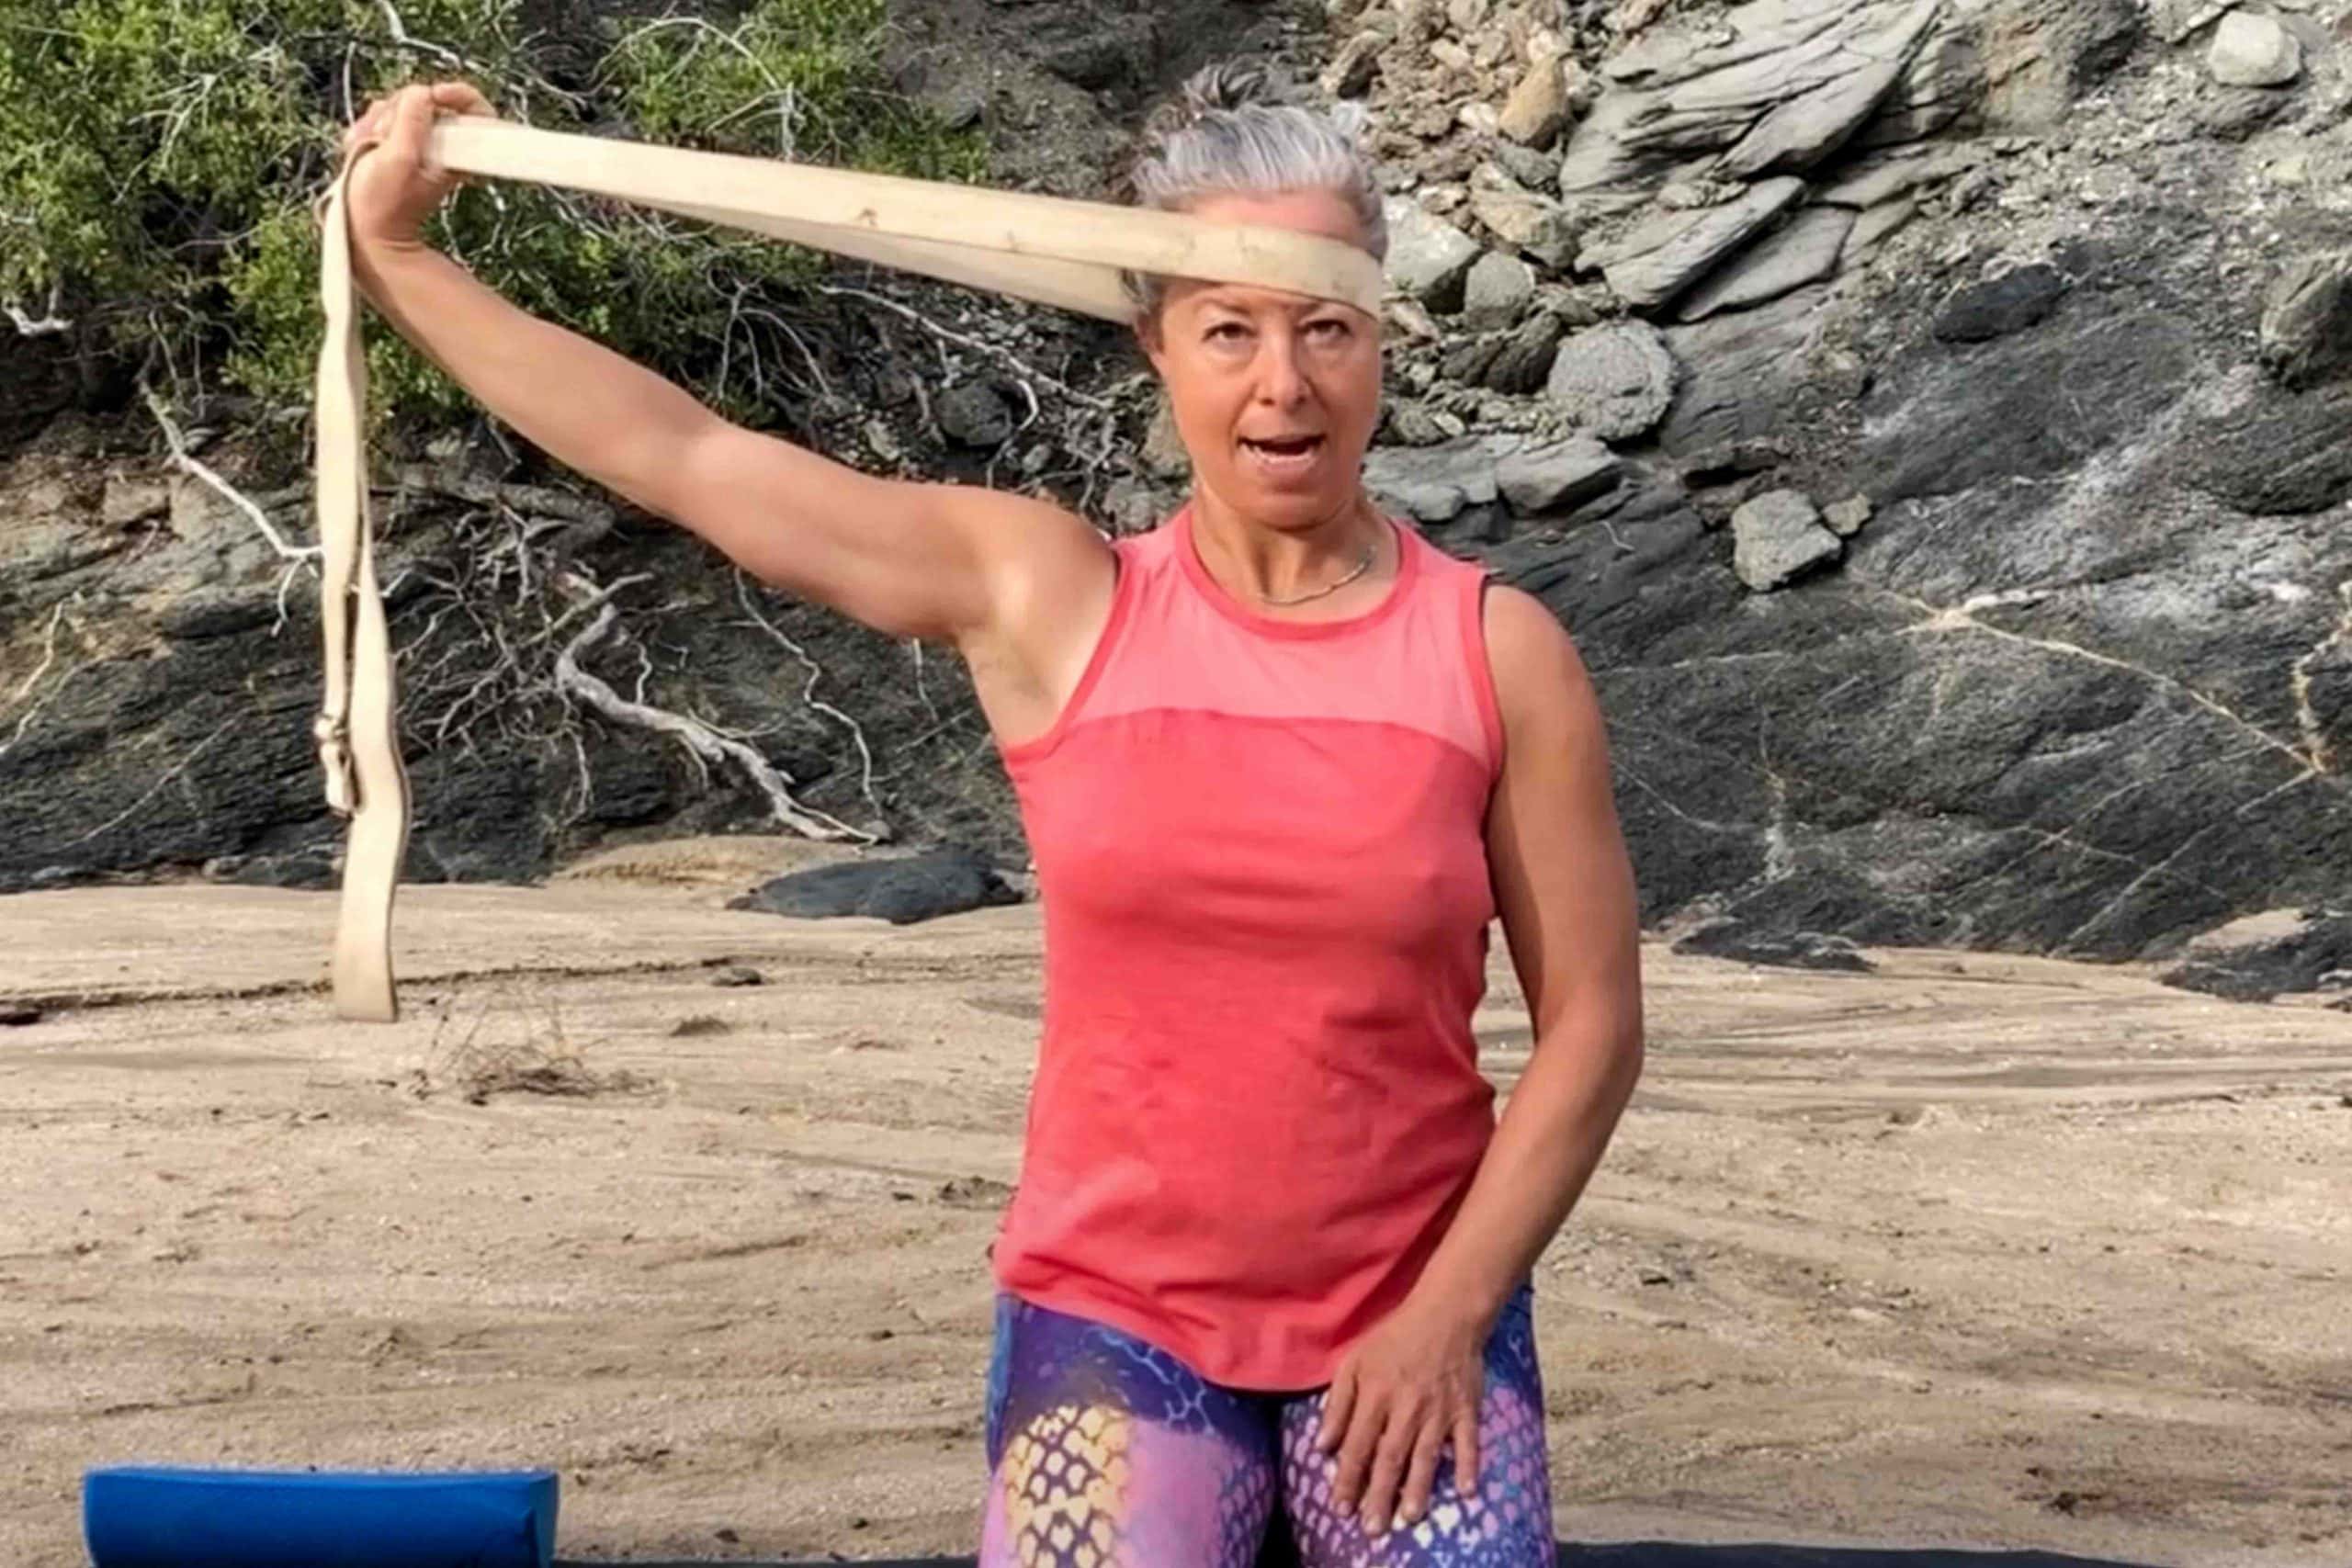
Step Five: Keep your low ribs GLUED to the wall and ramp up your head (the neck class in this post has all the details on how to ramp up). Don’t force anything and don’t move your ribs – it’s really easy to cheat here.
Step Six: Put your hand behind your head to measure the distance between you and the wall – sometimes this means 2 hands! The distance from the wall is the amount your upper back is overly curved, in principle you should be able to rest both your head and your lower ribs on the wall at the same time without forcing anything.
Remember: DO NOT PANIC. Most of us have WAY more hyperkyphosis than we knew. I used to have about an 8 finger curve and now mine is about 2.5 fingers. If I can do it, you can too! Keep reading for how to improve your spinal mobility and decrease your hyperkyphosis in the long term!
Drop Your Ribs!
The solution to hyperkyphosis starts with simply being aware of ribcage position and constantly practicing dropping our ribs.
Once our ribcage is relaxed down, we’ve taken a major step. Now we can SEE the problem. Now our core can work better. Now our spine is happier.
BUT, most of us now feel like a total hunchback, so that means we have to start working on the hyperkyphosis itself. Here’s what to do.
8 Steps To Fix Hyperkyphosis
There’s a lot to do to help hyperkyphosis. Some of it’s easy, some of it’s going to take more work. Here’s a quick list. It’s a lot, but don’t get overwhelmed – as always, start with something easy and add on over time.
Practice dropping your ribcage as much as you can.
Keep gently dropping your ribcage whenever you remember. This can take time, and don’t force it, just keep practicing. Check out my Ribcage Magic video series for instructions and tips on how to work on minimizing rub thrusting.
Learn how to ramp your head and neck.
You’ll want to work on head and neck position a bit too because once your ribcage is down where it belongs, you may discover that your head ends up too far forward. Here’s a class I taught that includes detailed instructions on how to ramp your head and neck.
Work on your shoulders
Thrusting our ribs is one way we compensate for a lack of shoulder mobility (it’s not just about hiding our hyperkyphosis). So shoulder work is important! Start here.
Release your psoas
Learn how to release your psoas muscles so that you’re able to drop your ribs with more ease and gentleness. Here’s how.
Mobilize your upper body
Work on neck, spine, shoulder blade and shoulder mobility (my Joints For Life course is a great starting point for this). All these parts need to move well in order to unlock the upper back.
Address the basic causes!
That means:
1️⃣ Sit in chairs less (try sitting on the floor instead)
2️⃣ Transition to minimal shoes (try my free Free Your Feet program), and
3️⃣ Learn how to access your back line when you walk so you don’t create that mini-whiplash any more. There’s a lot to learn here but start by reading this blog post. Anything that lengthens your calves and hamstrings and helps you learn to extend your hips will be useful, so as you continue your movement journey, keep this in mind.
Hang and climb
Add regular hanging and climbing to your life – the added bonus here is that hanging is great for your shoulders, core and upper body strength as well as your spinal alignment. Here’s more on why hanging is so great.