If you’ve been following me and/or had a chance to watch my Ribcage Magic videos, you’ve probably heard me talk about the importance of ‘ribs down’ alignment. One student recently emailed saying how much she loved the cue because when she pulls her ribs down, she really feels her core light up.
While I’m always glad to hear people are putting the work into their bodies, that message set off some big alarm bells.
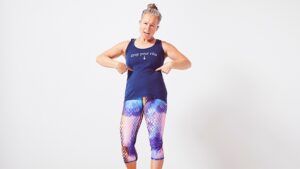
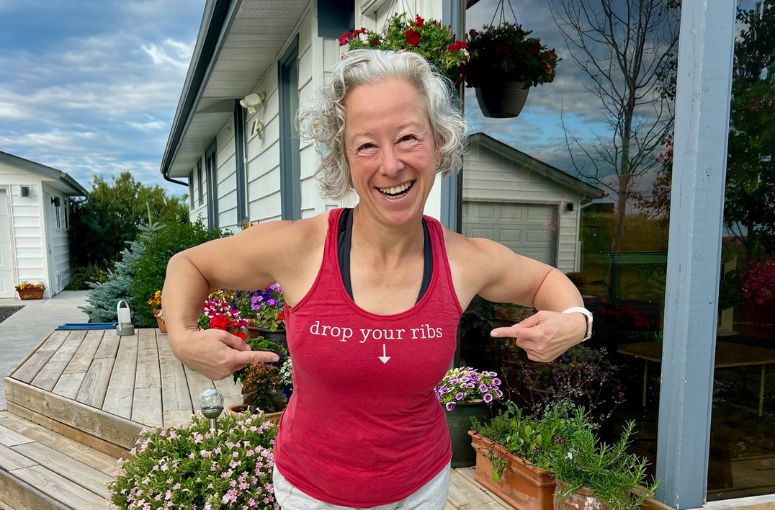
Here’s why: If you have to pull your ribcage down, something’s off.
Yes, getting your ribcage into better alignment is essential for strong core function, healthy breathing, and long-term joint and pelvic floor health. But tensing up your core muscles to do it is not the answer. In fact, creating more tension to counteract existing tension only adds to the problem.
So today, we’re going to explore what ribcage alignment really means, why so many of us have trouble with it, and how to start making changes that actually stick – without holding your breath, bracing your abs, or pulling your ribs into place.
What ‘Ribs Down’ Actually Means (not the same as rib flare)
Most of us have a habit of walking around with our ribcage lifted – what I usually call ribcage lifting, and what many people online might label rib flare – often without even realizing it. Here’s why this usually happens:
👉 ‘Good posture’ – we want to have good posture so we lift our ribcage to look better – instead of extending through our entire upper spine.
👉 Hyperkyphosis (aka an overly curved upper back – we lift our entire ribcage to camouflage what’s happening in our spine)
👉 Limited shoulder mobility (when our shoulders are tight, our spines often compensate with a ribcage lift)
👉 Tight psoas muscles (pulling the bottom of our ribcage forward gives a bit of slack to these muscles)
All of these can cause the body to lift the ribcage and rotate it forward from the bottom – a kind of mid-back hyperextension that mimics good posture, but puts a lot of strain on your spine and core.
In other words, we use one or two joints to create the look of a neutral spine (or true ‘good posture’) but which should really be created by all of the joints in our upper spine.
This helps us look good and keeps our eyes looking at the horizon – but it puts a ton of strain on our bodies. It:
- shears our spines,
- sabotages our core muscles and our breathing patterns,
- makes our mid-back muscles tight,
- overloads our pelvic floors,
- and even affects how we walk.
So getting our ribcage down is a HUGE deal and an essential part of moving in ways that nourish long term health! Grab my free Ribcage Magic series right here to figure out where your ribcage is in space!
Start healing your pelvic floor, building a functional core & caring for your spine (for free!)
Although the term rib flare has become popular to describe ribcage lifting, I don’t think it’s accurate – or helpful. Here’s why.
Rib Flare vs. Ribcage Lifting: What’s the Difference?
You may have seen the term “rib flare” online. It’s sometimes used to describe what I call ribcage lifting – but I think they’re quite different.
- Rib flare = sticky, immobile ribs stuck “open,” flaring outward at the bottom of the ribcage.
- Ribcage lifting = a rotational movement of the entire ribcage caused by hyperextending around the T11/T12 vertebrae in the mid-back.
Both can exist together. Both need attention. But reducing rib flare is mostly about breathing and rib mobility exercises.
In contrast, changing a ribcage lifting habit is about relaxing the ribcage down, improving shoulder & spinal mobility, and balancing the psoas muscles.
How to get your ribcage down
The first step to fixing this is to really understand what ‘ribcage down’ means in your own body. Then, you simply practice relaxing your ribs down all day long (if you haven’t already tried it, learn all the details in my free Ribcage Magic video series).
Notice that I said relax. Because if you have to PULL your ribcage down, it means that you’re fighting the tense muscles that are pulling your ribcage up (your psoas muscles), by creating new tension to pull your ribcage down.
Side note: it’s (probably) never a good idea to create extra body tension – most of us are too tense anyway and our muscles don’t love constant tension.
That’s why learning to relax your ribcage down – not pull it down – is such a game changer. But in order to do that, we need to understand what’s causing it to lift in the first place.
Why We Lift Our Ribcage
1️⃣ Hyperkyphosis
You might associate a rounded upper back with old age, but in reality, many people – young and old – have more forward curve in their upper spine than we realize.
Why? Surprisingly it’s not just because of using phones & computers all the time (although that doesn’t help either).
In fact, it’s often because of the way we walk! Most of us lack hip mobility, so we throw our bodies forward with each step, creating ‘mini whiplash’ forces all day long. Over time, this makes our upper backs get sticky and overly curved.
When we drop our ribcage, the hyperkyphosis that was ALREADY THERE becomes visible. This can be really unpleasant to see at first! But in reality, it’s actually big progress – because it’s the first step to truly improving our spinal alignment!
The fix? Apart from changing how we walk so we aren’t constantly throwing our upper bodies around, we also need to restore our upper back mobility!
Restoring your spinal mobility will help decrease your hyperkyphosis.
When our upper backs are more mobile, every joint can play its part (instead of getting all our lift from a single spot in the mid-back)!
Here’s a YouTube video I made with some of my favourite spinal mobility exercises to help you get your ribcage down without feeling hunched forward!
2️⃣ Tight Shoulders
If your shoulder joints are tight and you try to reach overhead, guess what moves instead? Yep – it’s your spine! Your mid-back shears forward into hyperextension and our ribcage lifts. So our shoulders get less movement and our spines get too much.
By rib lifting every time we lift our arms we (unintentionally) reinforce our rib lifting pattern and make it hard to improve our shoulder mobility.
The fix? Practice lifting your arms with your ribcage anchored, even if your range of motion feels small and it looks like you’re not doing as much! Shoulder mobility exercises with a stable ribcage are key.
Try this simple exercise to see what your shoulder/ribcage relationship is like – it’s a fun one but also very revealing!
Bonus: When it comes to shoulder mobility, hanging (yes, from the monkey bars) is a powerhouse move. The loads created by hanging help mobilise our shoulders (and it’s also a great way to mobilise your spine & decrease hyperkyphosis). Just make sure your ribs stay down while you hang!
(If you’re new to hanging, here’s a step-by-step guide I wrote about how to get started.)
3️⃣ Tight Psoas Muscles
Your psoas muscles connect diagonally between your mid-back and the fronts of your thighbones.

This means that if your psoas muscles are tight, they can pull your mid-back forward – which creates constant rib lifting.
FYI tight psoas muscles also affect your legs – which means they can also contribute to hip, knee & pelvic floor issues. Plus they mess up your walking by preventing hip extension, which means they’re part of the hyperkyphosis problem as well. It’s a big deal!
Our psoas muscles get tight when we sit a lot, when we wear shoes with a raised heel (which is basically all conventional footwear), when we’re anxious, and when we practice rib lifting thinking it’s good posture. So if any of these things apply to you, it’s likely that your psoas muscles are tighter than they could be.
The fix? Start by learning to release (not stretch!) your psoas muscles.
This is not always an easy project, especially when we’re stressed out and have a hard time relaxing.
My all time favourite exercise for this is the very gentle psoas release in this YouTube video.
Plus, there’s a self-assessment in the video to find out if your psoas muscles are actually tight. Fair warning – this is a very gentle exercise and you likely won’t feel much during the release. But it’s very effective if you practice, and it’s super good for your nervous system to take some time out as well!
After you’ve released your psoas muscles you can work on lunges to lengthen them – but the release needs to come first because you can’t effectively stretch a tense muscle.
A Long-Term Project That’s Worth It
Improving ribcage alignment isn’t a quick fix – and that’s OK.
This is deep, foundational work. You’re unwinding years (or decades!) of movement habits, tension, and compensation patterns.
But every little bit you do creates a ripple effect throughout your entire body.
You don’t have to be perfect.
Even small changes in how you carry and move your ribcage can have a huge impact on your core, your breathing, your walking, your digestion, your shoulder health and more. It’s all connected – and that’s the magic of this stuff!
But if that feels a bit overwhelming, here’s a quick recap of five things you can start doing today to improve your ribcage alignment (pick one to start!)
1️⃣ Find out whether you actually lift your ribcage, and practice relaxing it down. Not sure? Then grab my free Ribcage Magic series and get some clarity! FYI – if changing your ribcage position doesn’t decrease the amount your ribs stick out, then you have some rib flare going on!
2️⃣ If dropping your rib cage makes you feel hunched, prioritise spinal mobility work (hanging helps with this too)
3️⃣ If you notice that you lift your ribcage when you lift your arms overhead, work on shoulder mobility with a stable ribcage, and start hanging!
4️⃣ If your psoas muscles are tight, do lots of psoas releases, possibly followed by a few lunges.
5️⃣ Keep checking on your ribcage and relaxing it down whenever you can 🙂
Remember to take your time, stay curious, and trust that small shifts really do add up. Your spine (and the rest of your body) will thank you!
P.S. If this post has set off 💡light bulbs for you and you want more, you’ll love my Pelvic Floor+ program. Pelvic Floor+ dives deep into exercises to mobilise your shoulders, get your spine moving smoothly, get your ribcage into its spot, and melt away psoas tension. Click here to read more about Pelvic Floor+ and get started today!